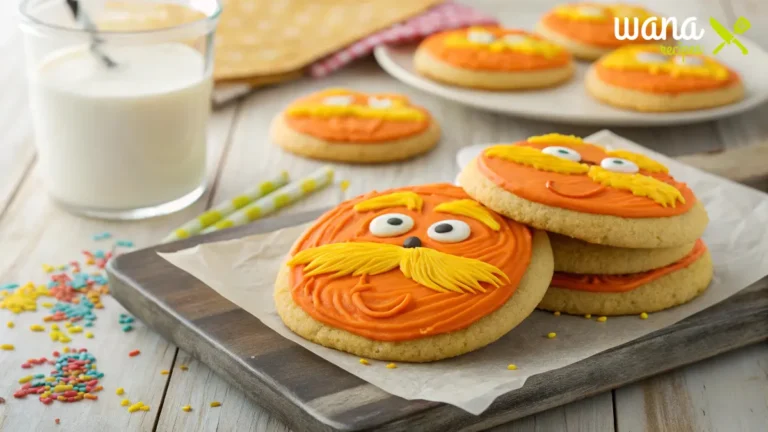
If you’re looking for a creative way to make your events more exciting, this Lorax cookie recipe is just what you need! These fun, vibrant cookies are perfect for themed parties, Earth Day celebrations, or even just a rainy-day activity with the kids. Not only are these cookies delightful to look at, but they’re also incredibly tasty and easy to make, even if you’re new to baking. The bold orange and yellow colors make them stand out, while the decorating process lets your creativity shine.
Inspired by the iconic Dr. Seuss character, the Lorax, these cookies aren’t just a treat—they’re a conversation starter about the importance of protecting our planet. The Lorax’s story teaches us about the value of sustainability, making these cookies a meaningful addition to any gathering. Plus, they’re an excellent way to introduce children to the joys of baking and creativity while subtly teaching them about the environment.
Whether you’re hosting a Lorax-themed party, celebrating Dr. Seuss Day, or simply looking for a unique snack idea, these cookies are sure to make an impression. In this article, you’ll discover a step-by-step guide to making the best Lorax cookie recipe, including everything from preparing the dough to adding those finishing decorative touches. You’ll also find tips on hosting a themed event, eco-friendly baking practices, and answers to frequently asked questions. Let’s get started and bring the Lorax to life in your kitchen!
Table of Contents
Why Make Lorax Cookies recipe?
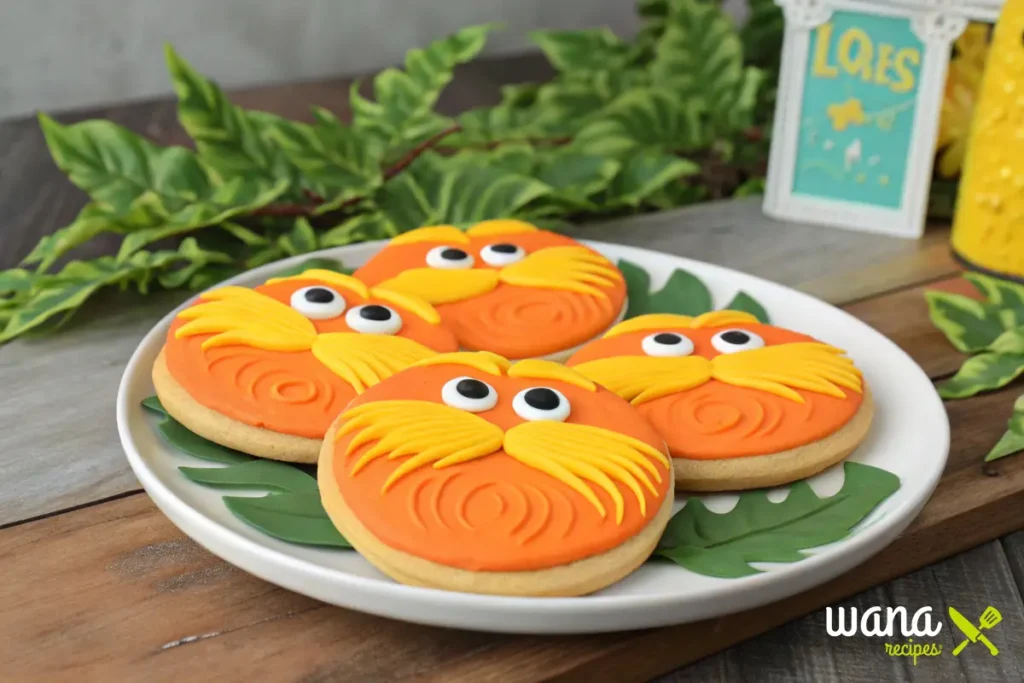
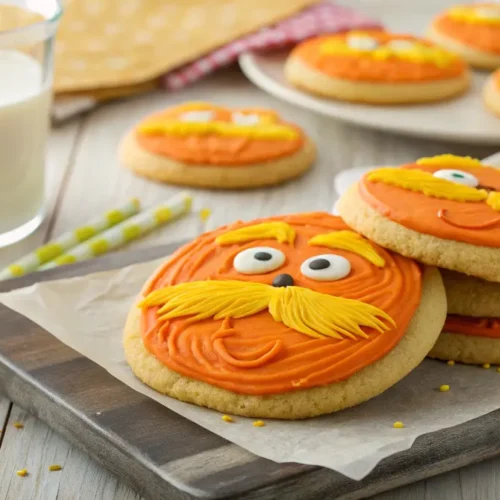
The Lorax, with his bright orange fur and bold yellow mustache, is a timeless symbol of environmental care. Recreating his look in cookie form is not only a fun activity but also an opportunity to spread awareness about sustainability.
Here’s why the Lorax cookie recipe is worth trying:
- Perfect for Themed Parties: Whether it’s a Dr. Seuss birthday party or an Earth Day gathering, these cookies are sure to steal the show.
- Family Fun: Baking and decorating these cookies with kids is an enjoyable way to teach them about nature and creativity.
- Customizable & Creative: With some icing and imagination, you can create Lorax cookies that are uniquely your own.
Looking for more fun food ideas? Don’t miss our guide on fun-themed treats.
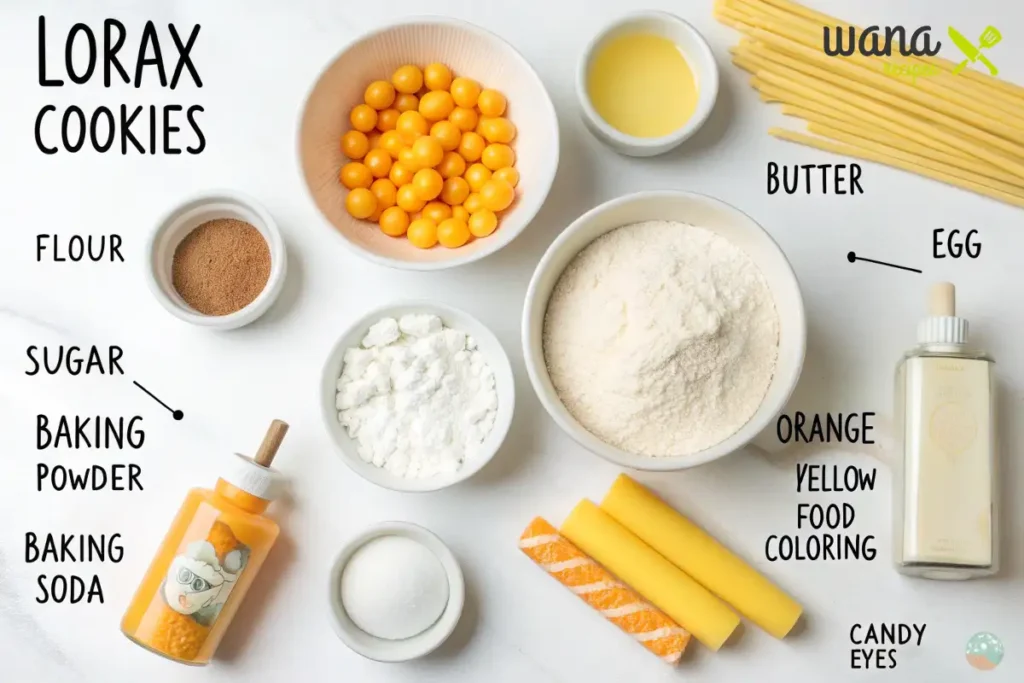
Ingredients for Lorax Cookies
Making the Lorax cookie recipe is simple, especially when you’ve got the right ingredients ready. Let’s break it down:
1. Cookie Dough Ingredients
- 2 ¾ cups of all-purpose flour
- 1 teaspoon baking soda
- ½ teaspoon baking powder
- 1 cup unsalted butter, softened
- 1 ½ cups granulated sugar
- 1 large egg
- 1 teaspoon vanilla extract
2. Decorations
- Orange food coloring (use natural options like carrot or turmeric powder for sustainability)
- Candy eyes or small white chocolate chips
- Yellow icing for the Lorax’s mustache
- Edible glitter (optional)
Pro Tip: For an eco-friendly touch, use organic or sustainably sourced ingredients wherever possible.
How to Make the Best Lorax Cookie Recipe
Step 1: Preparing the Dough
- Preheat the Oven: Set your oven to 375°F (190°C) to ensure it’s ready when your dough is.
- Mix the Dry Ingredients: In a medium bowl, whisk together the flour, baking soda, and baking powder.
- Cream Butter and Sugar: In a large mixing bowl, beat the softened butter and sugar until fluffy and light.
- Add Wet Ingredients: Add the egg and vanilla extract to the butter-sugar mixture, blending well.
- Combine Ingredients: Slowly incorporate the dry mixture into the wet ingredients, stirring until fully combined.
- Color the Dough: Add orange food coloring and mix until the dough is evenly colored.
Step 2: Rolling and Cutting
- Roll out the dough on a floured surface to about ¼-inch thickness.
- Use a round cookie cutter to create the Lorax’s face.
- Place the cutouts on a parchment-lined baking sheet, leaving space between each cookie.
Step 3: Baking the Cookies
Bake the cookies in the preheated oven for 8–10 minutes, or until the edges turn a light golden brown. Remove them and let them cool on a wire rack before decorating.
How to Decorate Your Lorax Cookies
The real fun begins with the decorating process. Here’s how to bring the Lorax to life:
Step 1: Create the Lorax’s Face
- Cover the surface of each cooled cookie with orange icing. Allow the base layer to dry completely.
- Place candy eyes or pipe white dots for the eyes. Add smaller black dots in the center for the pupils.
Step 2: Add the Mustache
- Use yellow icing with a star piping tip to create the Lorax’s fluffy mustache.
- Pipe two swirls just below the eyes to form the signature look.
Tip: Add a small black dot for the nose to complete the Lorax’s face. Sprinkle edible glitter for a magical touch.
Tips for Hosting a Lorax-Themed Party
Lorax cookies are the perfect centerpiece for a themed party. Here are some creative ideas to complement your treats:
- Decorations: Use bright orange and yellow hues inspired by the Lorax. Add Truffula tree decor made from recycled materials.
- Activities: Set up a crafting table where kids can make their own Truffula trees.
- Menu Pairings: Serve Lorax cookies alongside “Truffula Tree Cupcakes” and green smoothies.
For more snack ideas, check out our creative snack ideas for kids.
FAQs About Lorax Cookie Recipe
Lorax cookie recipe easy: Can it be simplified?
Yes, here’s how to make the Lorax cookie recipe easier:
- Use pre-made sugar cookie dough instead of making it from scratch.
- Purchase pre-colored orange and yellow icing to skip the coloring step.
- Opt for store-bought candy eyes for convenience.
What’s the best Lorax cookie recipe?
The best Lorax cookie recipe is one that’s made with love and attention to detail. Use quality ingredients, vibrant decorations, and creative piping techniques to make cookies that look as good as they taste.
Eco-Friendly Baking Tips
The Lorax is all about sustainability, and your baking can reflect that too. Here are some tips:
- Choose organic and local ingredients.
- Use reusable silicone baking mats instead of parchment paper.
- Opt for natural food coloring options to avoid artificial dyes.
Storing Your Lorax Cookies
To ensure your Lorax cookies stay fresh:
- Store undecorated cookies in an airtight container at room temperature for up to a week.
- Decorated cookies are best enjoyed within 3–4 days to preserve their design.
- Freeze undecorated cookies for up to three months, and thaw before decorating.
Conclusion: Bake Your Way to Fun with Lorax Cookies
The Lorax cookie recipe is not just about baking; it’s about creating memories, spreading joy, and even teaching valuable lessons about sustainability. Whether you’re preparing for a party or spending time with your family, these cookies are a delicious way to bring the Lorax’s message to life.
So why wait? Gather your ingredients, preheat your oven, and start baking the best Lorax cookie recipe today. Your cookies are sure to brighten any occasion and leave a lasting impression on everyone who sees (and tastes) them.
Easy Lorax Cookie Recipe
Ingredients
For the Cookies:
- 2 ¾ cups all-purpose flour
- 1 teaspoon baking soda
- ½ teaspoon baking powder
- 1 cup unsalted butter softened
- 1 ½ cups granulated sugar
- 1 large egg
- 1 teaspoon vanilla extract
For Decoration:
- Orange food coloring
- Yellow food coloring
- Candy eyes
- Orange and yellow candy melts
- Orange mini M&Ms
- Wax paper
Instructions
Prepare the Dough:
- Preheat your oven to 375°F (190°C).
- In a medium bowl, whisk together the flour, baking soda, and baking powder.
- In a separate large bowl, cream the softened butter and granulated sugar until light and fluffy.
- Beat in the egg and vanilla extract until well combined.
- Gradually add the dry ingredients to the wet mixture, mixing until a soft dough forms.
Shape and Bake:
- Roll the dough into 1-inch balls and place them 2 inches apart on an ungreased baking sheet.
- Flatten each ball slightly with the bottom of a glass.
- Bake in the preheated oven for 8 to 10 minutes, or until the edges are lightly golden.
- Remove from the oven and allow the cookies to cool on the baking sheet for 2 minutes before transferring them to a wire rack to cool completely.
Decorate the Cookies:
- Melt the orange candy melts according to the package instructions.
- Dip each cooled cookie into the melted orange candy, ensuring an even coating.
- Place the coated cookies on wax paper and immediately add candy eyes and an orange M&M for the nose.
- Melt the yellow candy melts and transfer them to a piping bag fitted with a small tip.
- Pipe yellow mustaches and eyebrows onto wax paper and allow them to harden.
- Once set, attach the mustaches and eyebrows to the cookies using a small amount of melted candy as adhesive.
Notes
- Calories: 150
- Total Fat: 7g
- Saturated Fat: 4g
- Cholesterol: 20mg
- Sodium: 100mg
- Total Carbohydrates: 20g
- Sugars: 12g
- Protein: 2g
Related Recipes and Ideas
For more creative dishes, check out: